Supplementary: I2C communication and sensors
Estimated time to complete this lab: 30 minutes
Objectives
At the end of this self-learning lab, you should be able to:
- install libraries
- take reading from different sensors
Info
This lab is optional.
I²C communication protocol

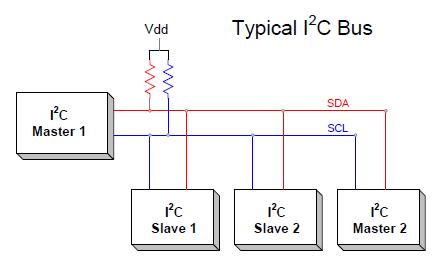
I²C (pronounced "I-squared-C") is a serial communication bus which allows master devices to send and receive data from slave devices. In our use case, the master would be the Arduino board, and the slave device would be a sensor.
Although the speed of data transmission through I²C is not very fast (~100kbits/s), it occupies a very little number of connections (only 2 wires SDA SCL!) to establish a connection between devices.
Moreover, the number of connections needed does not increase with an increase in devices. This makes I²C a very popular protocol in MCU-sensor connections.
The more you know
Although at the training level, it is not compulsory to know the details of I2C communication protocol, for your interest you can find out more about I²C from the following websites:
AS5600
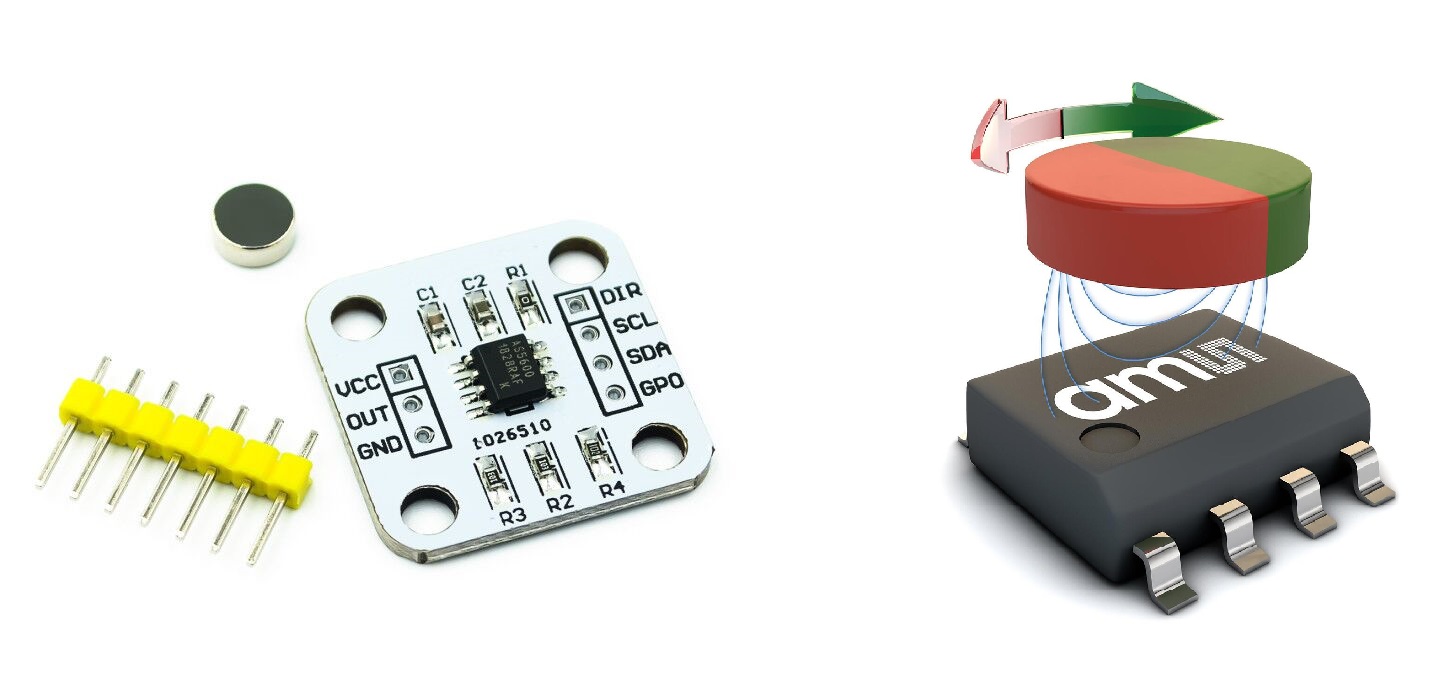
AS5600 is a programmable 12-bit high-resolution contactless magnetic rotary position sensor. It supports I2C output.

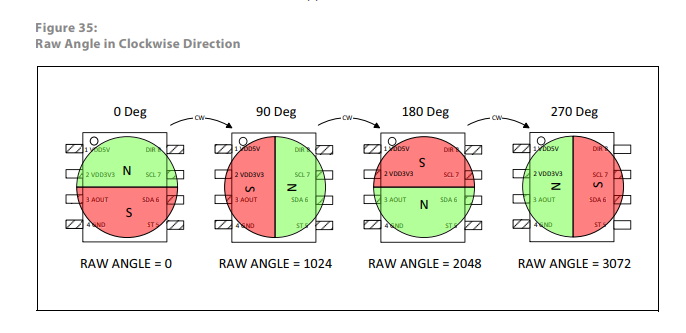
The magnet is specially designed, and when we rotate the magnet on top of the IC (integrated circuit), then we can obtain the sensor reading in our code via the I2C protocol.

If we are using hardware that is somewhat popular (e.g. AS5600, Arduino), chances are that someone else in the world has already written the communication part as a library, and we can simply use their code without having to reinvent the wheel. Simply put, we can "borrow" someone else's code to read the sensor reading of AS5600 in our Arduino board.
What is a library?
A library is code that written and contributed by many different people. It provides many great additional capabilities to run new and different hardware devices. The code will be inserted in your code if you add a library to your code.
Library installation
The first step to installing a library, obviously is to look for the library!
You can use the following library: https://github.com/Seeed-Studio/Seeed_Arduino_AS5600
To install the library:
- Clone/download the entire git repository and place it in the
libfolder.
$ cd lib
$ git clone https://github.com/Seeed-Studio/Seeed_Arduino_AS5600.git
- You can open the example code to see how to use the library. Usually, look for a folder named
examplesand look for the example usage of the library.
In this case, you will find lib/Seeed_Arduino_AS5600/examples/readAngle/readAngle.ino (online) worth looking at.
Try it yourself 1.3.1
Please make the following connections by yourself via the breadboard:
| Pin on AS5600 | Pin on Arduino |
|---|---|
| VCC | 3V3 |
| GND | GND |
| SDA | A4 |
| SCL | A5 |
| DIR | GND |
To understand the above table, you may refer to the pin assignments in the AS5600 manual and Arduino UNO pinout.
Copy the code from readAngle.ino into src/main.cpp. Try to upload the example code into the Arduino, then rotate the magnet on top of the sensor and note its behavior.
You should see the sensor reading change when you rotate the magnet on top of the sensor.
Please approach our team members after you have completed the task. In your training repository, save the code into a new file named cw-1-3-1.cpp. Commit and push the code. If you don't know how to use git/github, you can refer to the internal git tutorial here.
Section Check Box:
- What is a library
- How to install and include library
- Using AS5600 magnetic absolute encoder