Lab 1.1 IDE setup and blink
Estimated time to complete this lab: 30 minutes
Objectives
At the end of this self-learning lab, you should be able to:
- start using Visual Studio Code to program the Arduino
- write basic Arduino codes
Visual Studio Code + Platform IO
Although the official Arduino IDE is a popular IDE to program an Arduino, Visual Studio Code (VS Code) is a better IDE as it provides better syntax highlighting and the Platform IO plugin allows us to install new library to our project with ease. Furthermore, we use VS Code for most development in M2, so it's better for you to get familiar with it early on .
Installation
Go to: https://code.visualstudio.com/ and install Visual Studio Code
Then click the Extension icon on the left and search PlatformIO IDE and install it.
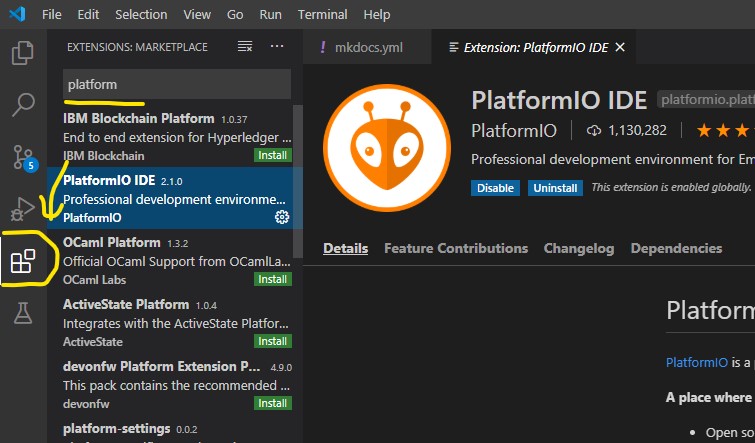
After the install is success, restart the IDE.
Create new project
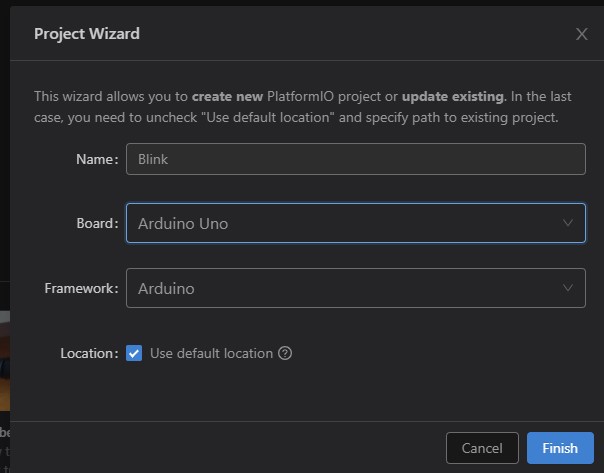
Click the Platform IO icon on the left and go to PIO home

Give name to project and select Arduino Uno as the board we are using.
Edit "blink" source file
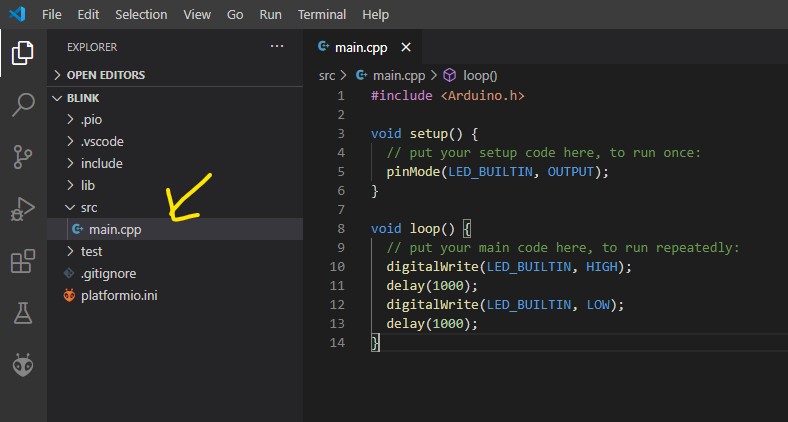
Insert the following code into main.cpp
#include <Arduino.h>

void setup() {
    // put your setup code here, to run once:
    pinMode(LED_BUILTIN, OUTPUT);
}

void loop() {
    // put your main code here, to run repeatedly:
    digitalWrite(LED_BUILTIN, HIGH);
    delay(1000);
    digitalWrite(LED_BUILTIN, LOW);
    delay(1000);
}
Let's upload the code to the Arduino board. You need a suitable USB cable and the Arduino board.
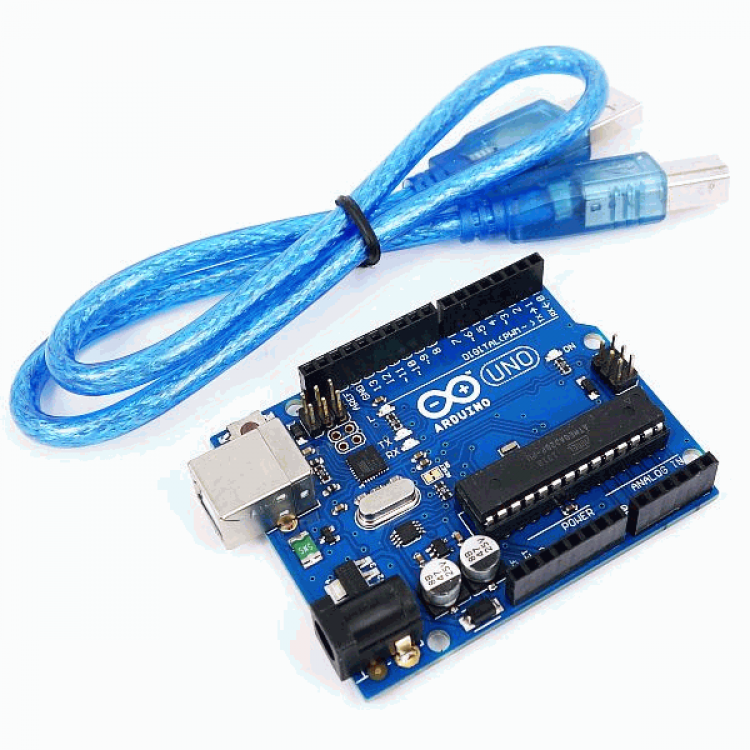
Plug in the USB wire to Arduino board and the other side to the computer. A LED on the board turned on shows that the it is working.
Build and upload the code by using the the buttons on the bottom-left corner
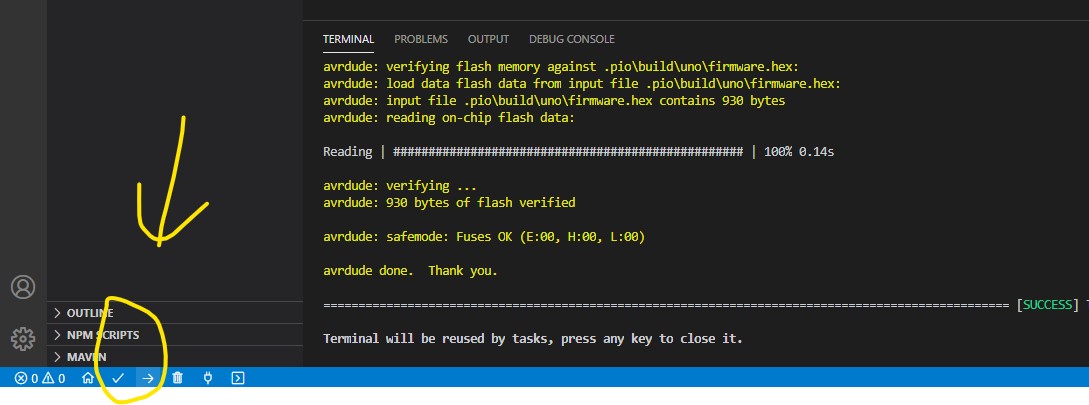
If everything works fine, you should see the LED on Uno blinking.
If you have problem when uploading, install driver from here
Please approach our team members if you face any connection issues.
Code explanation
void setup(): It is a function the Arduino boards run once at startup.{and}on line 1 and 3 defines the scope of setup() function.void loop(): It will run repeatedly after thesetup()function has completed.
The program flow is summarized below:

- Inside this
setup()function, on line 2, we havepinMode(LED_BUILTIN, OUTPUT);written there. This line is an instruction that tells the board to do something.- This instruction is called a statement. Usually a statement fit in exactly one line. Each statement MUST end with a semicolon to denote that the statement has finished.
pinMode(LED_BUILTIN, OUTPUT)- It configures a pin as either an input or an output.
- Input means you use the pin to detect the voltage on the external circuit connected to that pin (will be discussed later), while output means you use the pin to output a voltage to control something.
LED_BUILTINandOUTPUTare the two parameters that are required bypinMode().LED_BUILTINmeans you are referring to pin LED_BUILTIN. Thus, you can change it to another pin, so that the pin mode of another pin can be defined.OUTPUTmeans you want the pin you have stated in the 1st statement to be in output mode. You can change it toINPUTso the pin is defined to be inINPUTmode.- Noted that the
Min pinMode must be in capital letter. The word OUTPUT and INPUT must be in capital letter too.
- After the setup is finished, the program will then go into the
loop()function. Line 6-9 are the 4 statements inside loop(). digitalWrite(LED_BUILTIN, HIGH)- It means supplying 3.3 volts (
HIGHlogic signal) to pinLED_BUILTINfrom 0 volt (LOW logic signal) before this statement is executed. digitalindigitalWritemeans you can only write eitherHIGHorLOWvalue to the pin, corresponding to1or0for computer.WriteindigitalWritemeans you are writing a value a pin, rather than reading a value. The opposite of this statement isdigitalRead(pin)which will be discussed later.- Just like in
pinMode(LED_BUILTIN, OUTPUT);,LED_BUILTINandHIGHindigitalWrite(LED_BUILTIN, HIGH)are the two parameters for digitalWrites. - The statement
pinMode(LED_BUILTIN, OUTPUT);must be executed beforedigitalWrite(LED_BUILTIN, HIGH);, otherwise you may encounter unexpected situations.
- It means supplying 3.3 volts (
delay(1000);- It pauses the program for the amount of time (in milliseconds) specified as parameter.
- 1000 means 1000 milliseconds, which is equal to 1 second.
digitalWrite(LED_BUILTIN, LOW)- Similar
to digitalWrite(LED_BUILTIN, HIGH);, it controls the voltage output of pin LED_BUILTIN. This time, it assigns aLOWvalue to pinLED_BUILTIN, which means supplying 0 volt to the pin.
- Similar
- Comment - useful but also useless
- You may notice that there are sentences after the statements. They are comments.
- Comments are lines in the program that are used to inform yourself or others about the way the program works. They are ignored by the Arduino. Thus, comments are useful for yourself to view the code, but useless for the board to execute the code.
- Comments only purpose are to help you understand (or remember) how your program works or to inform others how your program works. There are two different ways of marking a line as a comment.
- Using double slash
//- The comment starts after the
//. It is a single line comment. Anything after the slashes is a comment to the end of the line.
- The comment starts after the
- Using
/*and*/- The comment starts after
/*, all the way through lines and sentences to*/. Unlike the double slash, it is multiline comment, using to comment out whole blocks of code.
- The comment starts after
Section Check Box:
-
pinMode(pin , mode) - semi-colon
; -
digitalWrite(pin , value) -
delay(milliseconds) - Comment
//or/* … */
Classwork 1.1.1
SOS
Write an Arduino code to light up LED 13 on the board, sending out the S.O.S. signal. In Morse code, "S" is represented by 3 short flashes, while "O" is represented by 3 long flashes.
Please approach our team members after you have completed the task. In your training repository, save the code into a new file named cw-1-1-1.cpp. Commit and push the code. If you don't know how to use git/github, you can refer to the internal git tutorial here.
References
- m2_wiki - Arduino Tutorials (Getting Started with Arduino IDE): https://github.com/m2robocon/m2_wiki/wiki/Arduino-Tutorials-(Getting-Started-with-Arduino-IDE)
- Arduino - BoardAnatomy: https://www.arduino.cc/en/guide/BoardAnatomy